
Home » Controller Authentication Upgrade (Kits Only)
Controller Authentication Upgrade (Kits Only)
Controller Authentication Upgrade
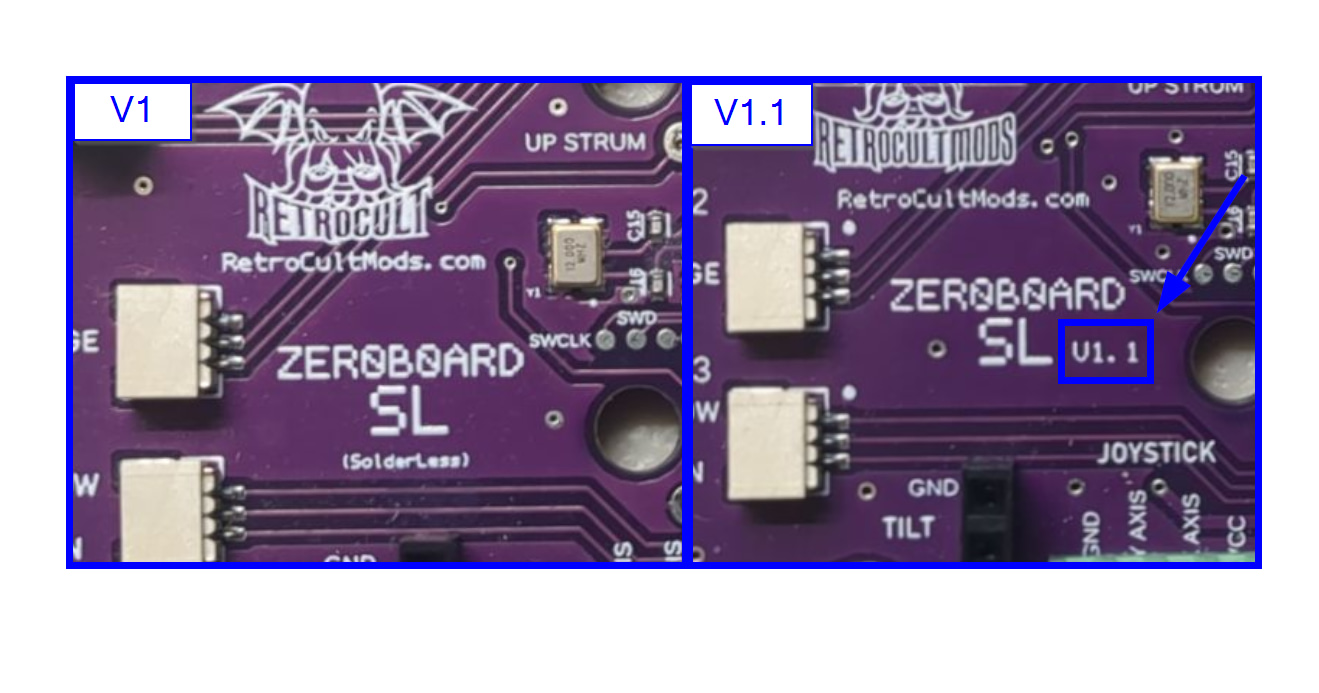
Solderless Kits - Identifying your board version
Check your Zeroboard SL to determine if it is the original version or version 1.1. The 1.1 version will have “v1.1” on the board, while the original will not have any version number. This will determine which preset gets applied in the next step.
Once you have determined your board version, follow the corresponding guide below.
Solderless Kits - Connecting the cable (Original)
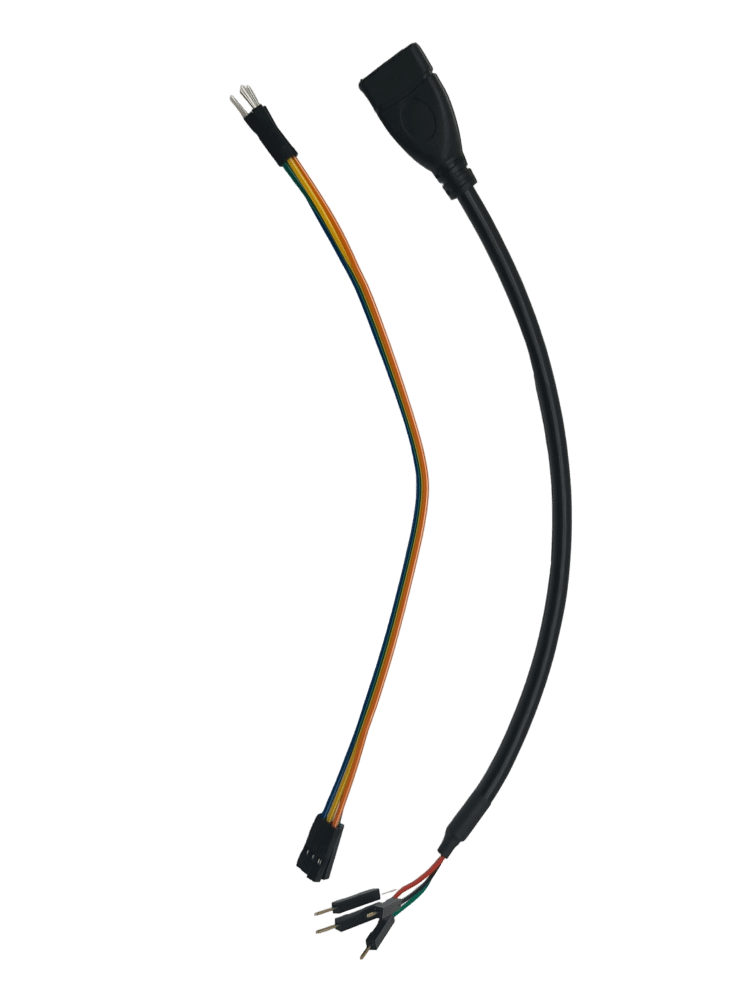
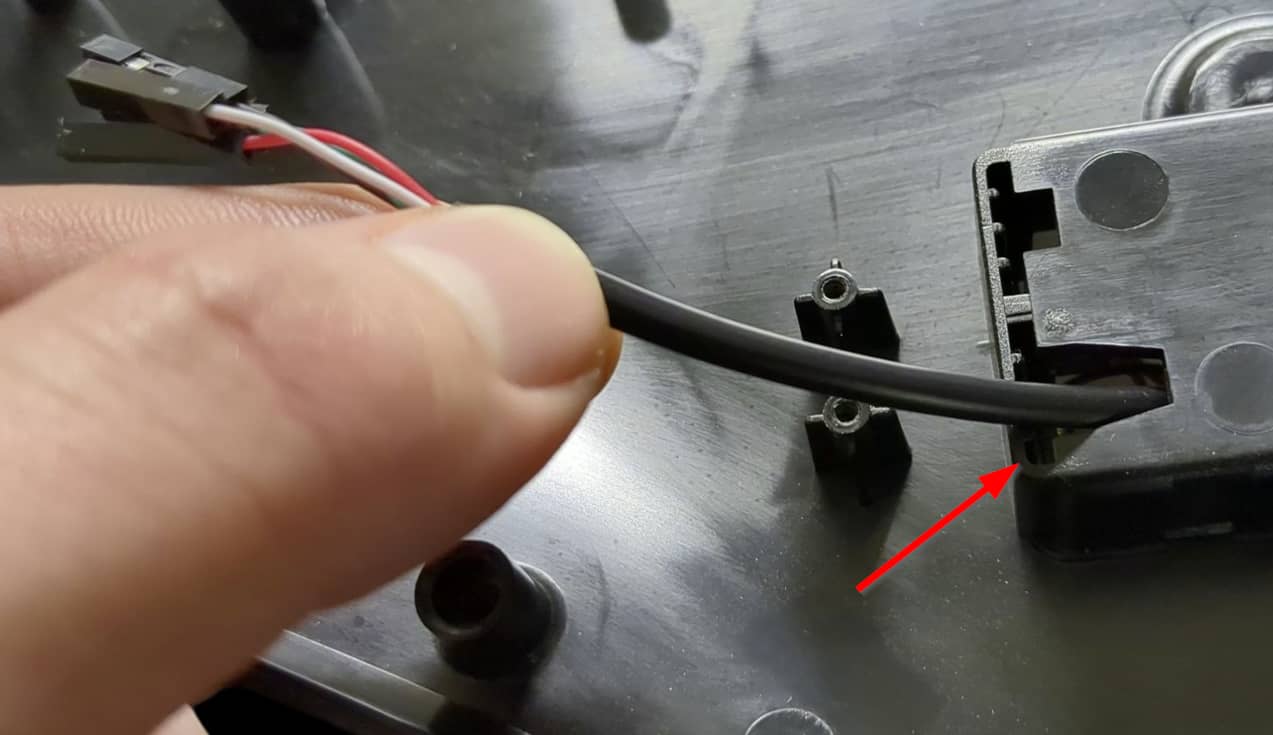
The original version of the Zeroboard SL does not have a dedicated AUTH section like the v1.1 does. However, we can still use controller authentication on these boards by repurposing either the slider or joystick sections. Both methods will require you to connect the RED wire of the auth cable to the VBUS pin near the USB-C port (1st picture). You will need to use the provided extension wire for this installation.
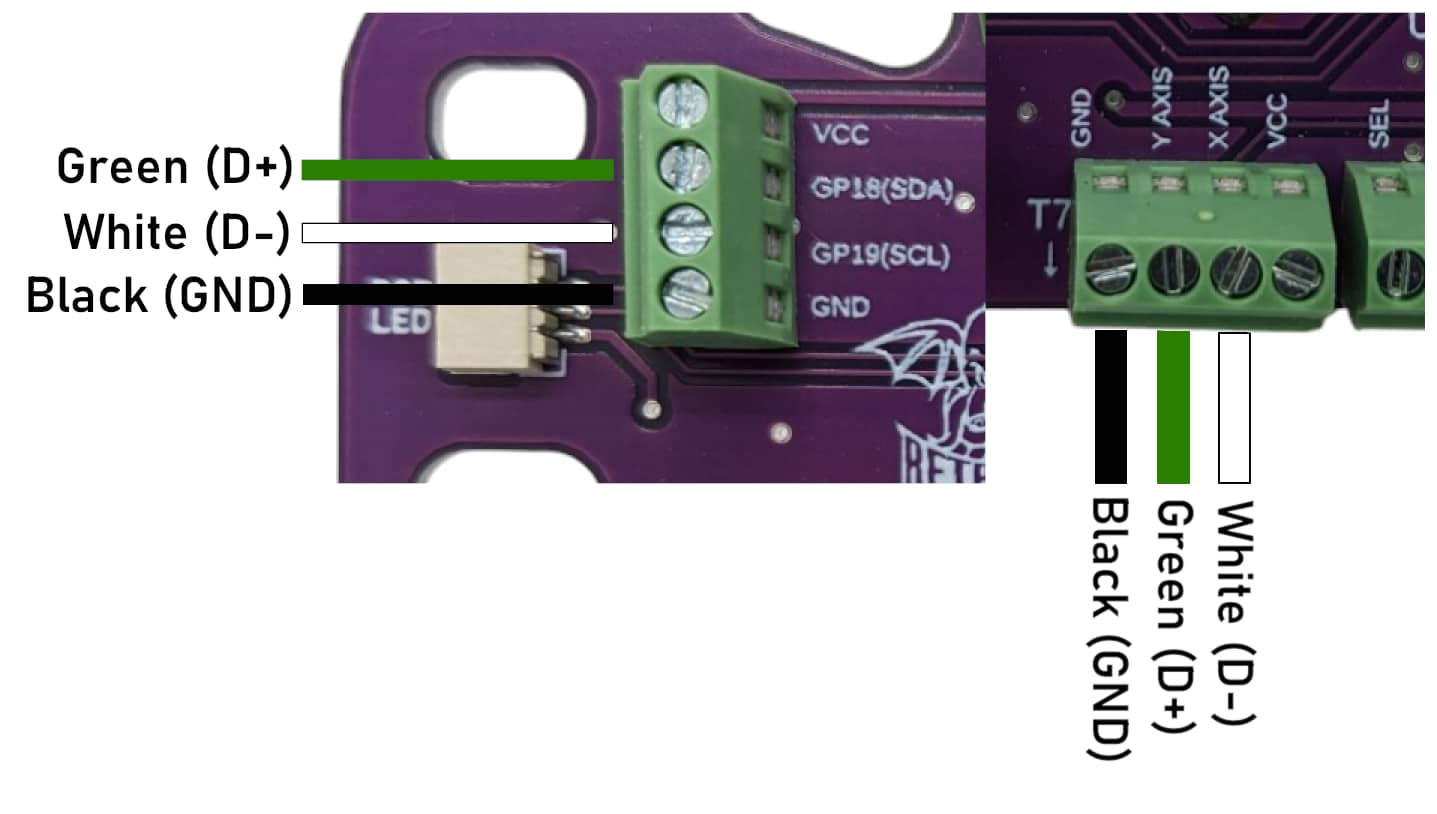
SLIDER: I recommend most people to use the Slider section, as not many people wire this up, as it is only used for GH5 guitars. The pinout goes as follows (2nd picture, left side):
GREEN -> GP18(SDA)
WHITE -> GP19(SCL)
BLACK -> GND
JOYSTICK: If your Slider section is occupied, then you can use the Joystick section for auth instead. Here is the pinout (2nd picture, right side):
BLACK -> GND
GREEN -> Y AXIS
WHITE -> X AXIS
Solderless Kits - Connecting the cable (v1.1)
Insert the Controller Authentication cable’s exposed pins into the Zeroboard SL’s AUTH connector, using the following pinout:
RED -> VBUS
WHITE -> AUTH –
GREEN -> AUTH +
BLACK -> GND
Tighten the screw terminal screws onto the metal prongs of the exposed pins.
Use the provided extension wires if the USB end of the authentication cable will not reach the battery compartment or Wii remote slot. You can also add it if you want to give your cable some extra length.
Solderless Kits - Programming
If you have an original Zeroboard SL and you have an auth cable installed, you must use either the Default (Auth/No Slider) or Default (Auth/No Joystick) preset, depending on which section you installed the cable into.
If you installed it into the Slider section, you will use the Auth/No Slider preset.
If you installed it into the Joystick section, you will use the Auth/No Joystick preset.
Make sure to click Load Preset after making your selection.
Zeroboard SL v1.1 does not need any special programming; the Default v1.1 preset can be used!
DIY Kits - Connecting the cable
Insert the Controller Authentication cable’s exposed pins into the Zeroboard, using the following pinout:
RED -> 5V
WHITE -> AUTH –
GREEN -> AUTH +
BLACK -> GND
Use the provided extension wires if the USB end of the authentication cable will not reach the battery compartment or Wii remote slot. You can also add it if you want to give your cable some extra length.
Solder the metal prongs of the cable/extension wire to the correct pads on the board. I recommend feeding the prongs in from the bottom of the board so you can solder them easily from the top!
Mounting the cable
Kramer, Xbox/Playstation Les Paul
Wii Guitars (all models)
Xbox/Playstation World Tour, GH5
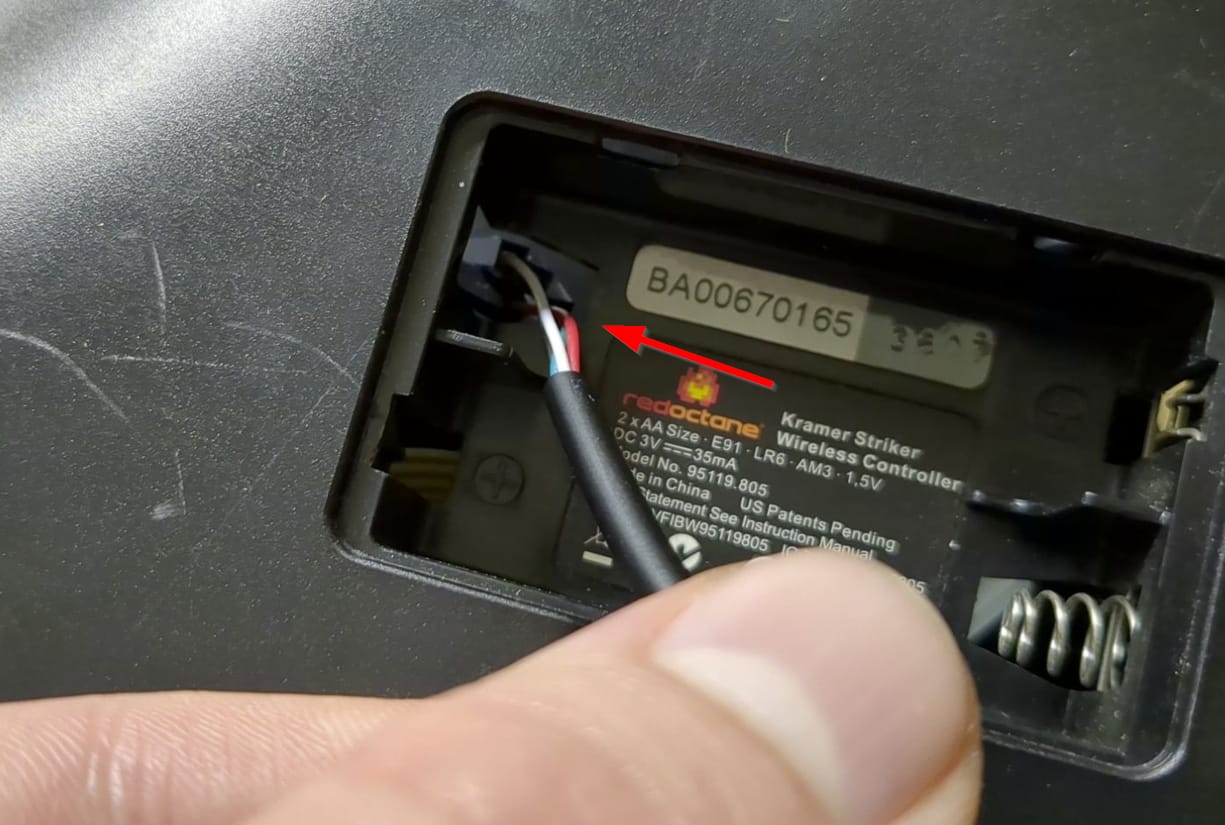
Remove the 4x T6 screws and remove the battery compartment.
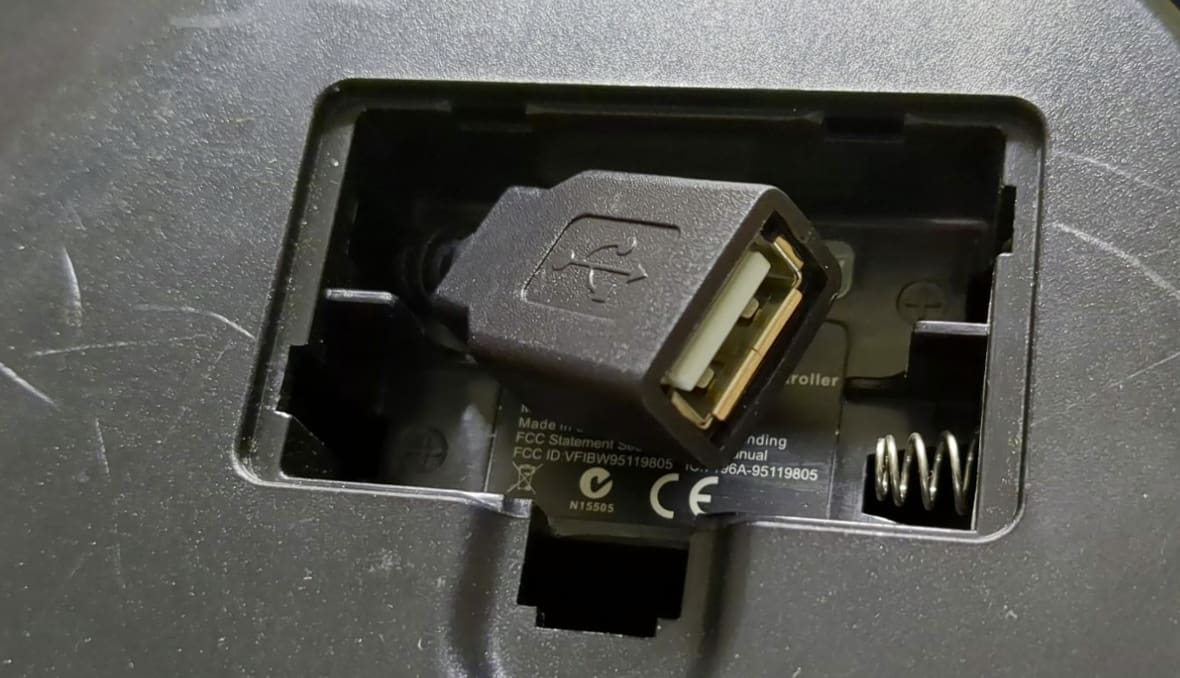
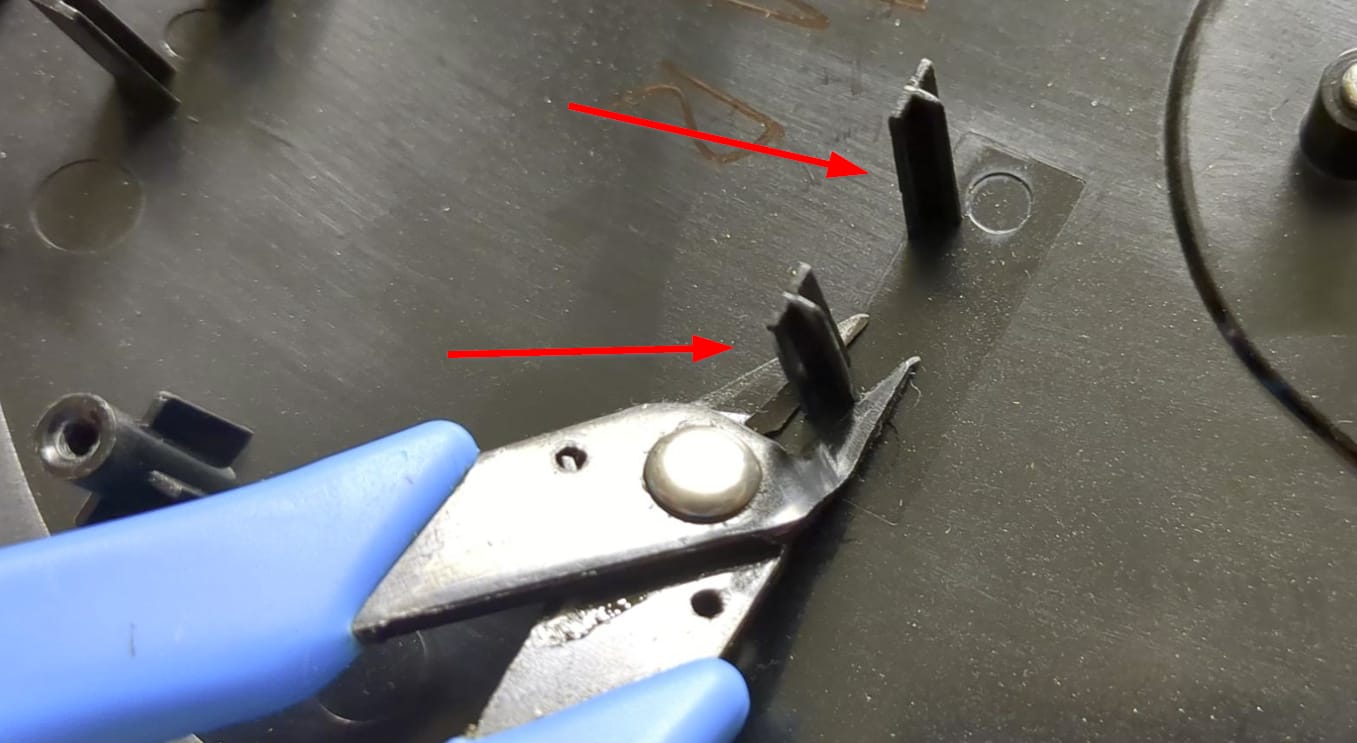
Wedge the authentication cable between the two support standoffs to keep it in place. You can pull out the cable when needed, and then stow it away by keeping it wedged between the supports. Make sure to keep the battery cover so you can put it back on when not in use!
SG and Xplorer
Unfortunately there is no clean and easy way to mount the authentication cable in these two modes.
The SG will require the body shell itself to be cut/drilled so you can feed the cable out of the shell.
The Xplorer can work by hanging the auth cable out of the headset slot, but that doesn’t look the best.
Functionally the cable will work, so if you come up with a more creative way to mount the authentication cable, then feel free to do so!

Still have questions?
If you have a question about something that isn’t covered here, check out our additional resources.
And if that doesn’t do the trick, you can send an email to support@RetroCultMods.com or through the button below.
Contact Details
Quick Links
© 2024 RetroCultMods. All Rights Reserved.